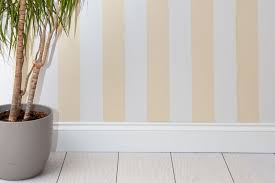
Transform Your Space: Painting Stylish Stripes on Your Wall

Painting Stripes on Wall: A Creative DIY Project
Adding stripes to a wall can transform a room and give it a fresh, modern look. Whether you want to create a bold statement or add subtle texture, painting stripes is a versatile and cost-effective way to update your space. Here are some tips for painting stripes on your wall:
Materials Needed:
- Painter’s tape
- Measuring tape
- Pencil
- Level
- Paint rollers and brushes
- Paint in your desired colours
- Drop cloths or plastic sheets to protect the floor
Steps to Paint Stripes:
- Clean and prep the wall: Make sure the wall is clean and smooth before starting. Fill in any holes or cracks and let dry.
- Choose your colours: Select the colours you want for your stripes. Consider contrasting colours for a bold look or similar shades for a more subtle effect.
- Measure and mark: Use a measuring tape, pencil, and level to mark where each stripe will go. Decide on the width of each stripe and mark accordingly.
- Tape off the stripes: Use painter’s tape to mask off the areas where you want the stripes. Press down firmly on the edges of the tape to ensure clean lines.
- Paint between the lines: Using a roller or brush, paint between the taped-off areas with your chosen colours. Apply multiple coats as needed for full coverage.
- Remove the tape: Once the paint is dry to the touch but not completely cured, carefully remove the painter’s tape to reveal crisp, clean lines.
- Touch up as needed: If there are any areas where paint bled under the tape, use a small brush to touch up those spots for a polished finish.
With these simple steps, you can easily transform any room with stylish painted stripes on the walls. Get creative with different colour combinations and stripe widths to achieve your desired look!
6 Essential Tips for Perfectly Painted Stripes on Your Walls
- Use a level and painter’s tape to mark straight lines for the stripes.
- Choose complementary colours for an eye-catching contrast.
- Start with a base coat and let it dry completely before applying the stripes.
- Work in small sections to ensure clean edges between the stripes.
- Remove the painter’s tape carefully while the paint is still slightly wet to prevent peeling.
- Step back regularly to check the overall look and make any necessary adjustments.
Use a level and painter’s tape to mark straight lines for the stripes.
To ensure precise and straight lines when painting stripes on a wall, it is essential to use a level and painter’s tape to mark the boundaries of each stripe. The level helps maintain horizontal or vertical alignment, while the painter’s tape acts as a guide for clean and defined edges. By taking the time to measure and mark with accuracy using these tools, you can achieve professional-looking results that enhance the overall aesthetic of the room.
Choose complementary colours for an eye-catching contrast.
When painting stripes on a wall, selecting complementary colours can create a striking and eye-catching contrast that adds depth and visual interest to the space. By choosing colours that are opposite each other on the colour wheel, you can achieve a dynamic and vibrant look that will make your walls stand out. Whether you opt for bold hues or subtle shades, complementary colours can elevate the design of your room and create a visually appealing focal point.
Start with a base coat and let it dry completely before applying the stripes.
To achieve clean and professional-looking painted stripes on your wall, it is essential to start with a base coat and allow it to dry completely before moving on to the next step. Applying a base coat not only provides a smooth and uniform surface for your stripes but also helps the colours of the stripes stand out vividly. Allowing the base coat to dry thoroughly ensures that the tape used to create the stripes adheres properly and prevents any bleeding of paint under the edges. This simple yet crucial tip sets the foundation for a successful and visually appealing striped wall design.
Work in small sections to ensure clean edges between the stripes.
To achieve crisp and clean edges between the painted stripes on your wall, it is essential to work in small sections. By focusing on one section at a time, you can ensure that the paint is applied evenly and that the edges of each stripe remain sharp and well-defined. Working methodically in small areas allows you to maintain control over the painting process and helps prevent smudges or uneven lines, resulting in a professional-looking finish for your striped wall design.
Remove the painter’s tape carefully while the paint is still slightly wet to prevent peeling.
Removing the painter’s tape carefully while the paint is still slightly wet is a crucial tip to prevent peeling and ensure clean, crisp lines in your wall striping project. By doing so, you can avoid the risk of the dried paint sticking to the tape and tearing off when removed, which can ruin the smooth finish of your stripes. Taking this extra care during the removal process will help you achieve professional-looking results and maintain the integrity of your painted stripes.
Step back regularly to check the overall look and make any necessary adjustments.
When painting stripes on a wall, it is crucial to step back regularly to assess the overall look and make any necessary adjustments. Taking a moment to view the stripes from a distance allows you to see how they interact with the rest of the room and ensure that they are straight and evenly spaced. Making minor corrections as you go along will help maintain a cohesive and professional finish, resulting in a visually pleasing outcome for your DIY project.
